In continuation with the sushi experiment, the next step was performing a gel electrophoresis with the genomic DNA (gDNA) and PCR products, beginning with gDNA.
First, a gel tray with solidified gel was placed into a gel box. The red electrical connector was placed towards the bottom and the gel tray was placed so that the top of the gel was positioned away from the red connector. Then, 1x TAE buffer was poured into the gel box to cover the gel by about 2mm.
On a medium-sized square of Parafilm, 2.0 µl drops of Loading Dye were pipetted using a p200. Enough dots were made for each sample. To each dot, 3.0 µl of gDNA was added, ensuring the gDNA was added to the appropriate dot (i.e. gDNA from sample 1 was added to dot 1).
A p10 pipette was calibrated to 8 µl and was then used to pipette each dot on the Parafilm into the corresponding well of the gel tray. Finally, the gel box was covered and ran for approximately 15 minutes at 145 volts. In this part of the experiment, the gel ran for 10 minutes longer, for a total of 25 minutes.
After the run, the gel tray was scanned.
Next, gel electrophoresis was performed using the PCR product.
The tray used above (after being scanned) was placed into a beaker and was microwaved for 30 seconds. Then, 1.0 µl of Gel Red was added into the beaker. The beaker was gently swirled to allow reagents to mix.
A gel cast was then tightly fitted into a casting rig. Two combs were placed in the top and middle slots. Then, the beaker solution was poured into the gel cast and was left to solidify for about 20 minutes. Once the gel hardened, the gel cast was removed from the gel rig. The gel tray was placed into the gel box and 1x TAE buffer was poured over the gel to cover the tray by about 2mm. Gel combs were removed from the gel tray.
On a medium-sized square of Parafilm, 2.0 µl drops of Loading Dye were pipetted using a p200. Enough dots were made for each sample. To each dot, 3.0 µl of PCR product was added, ensuring the PCR product was added to the appropriate dot.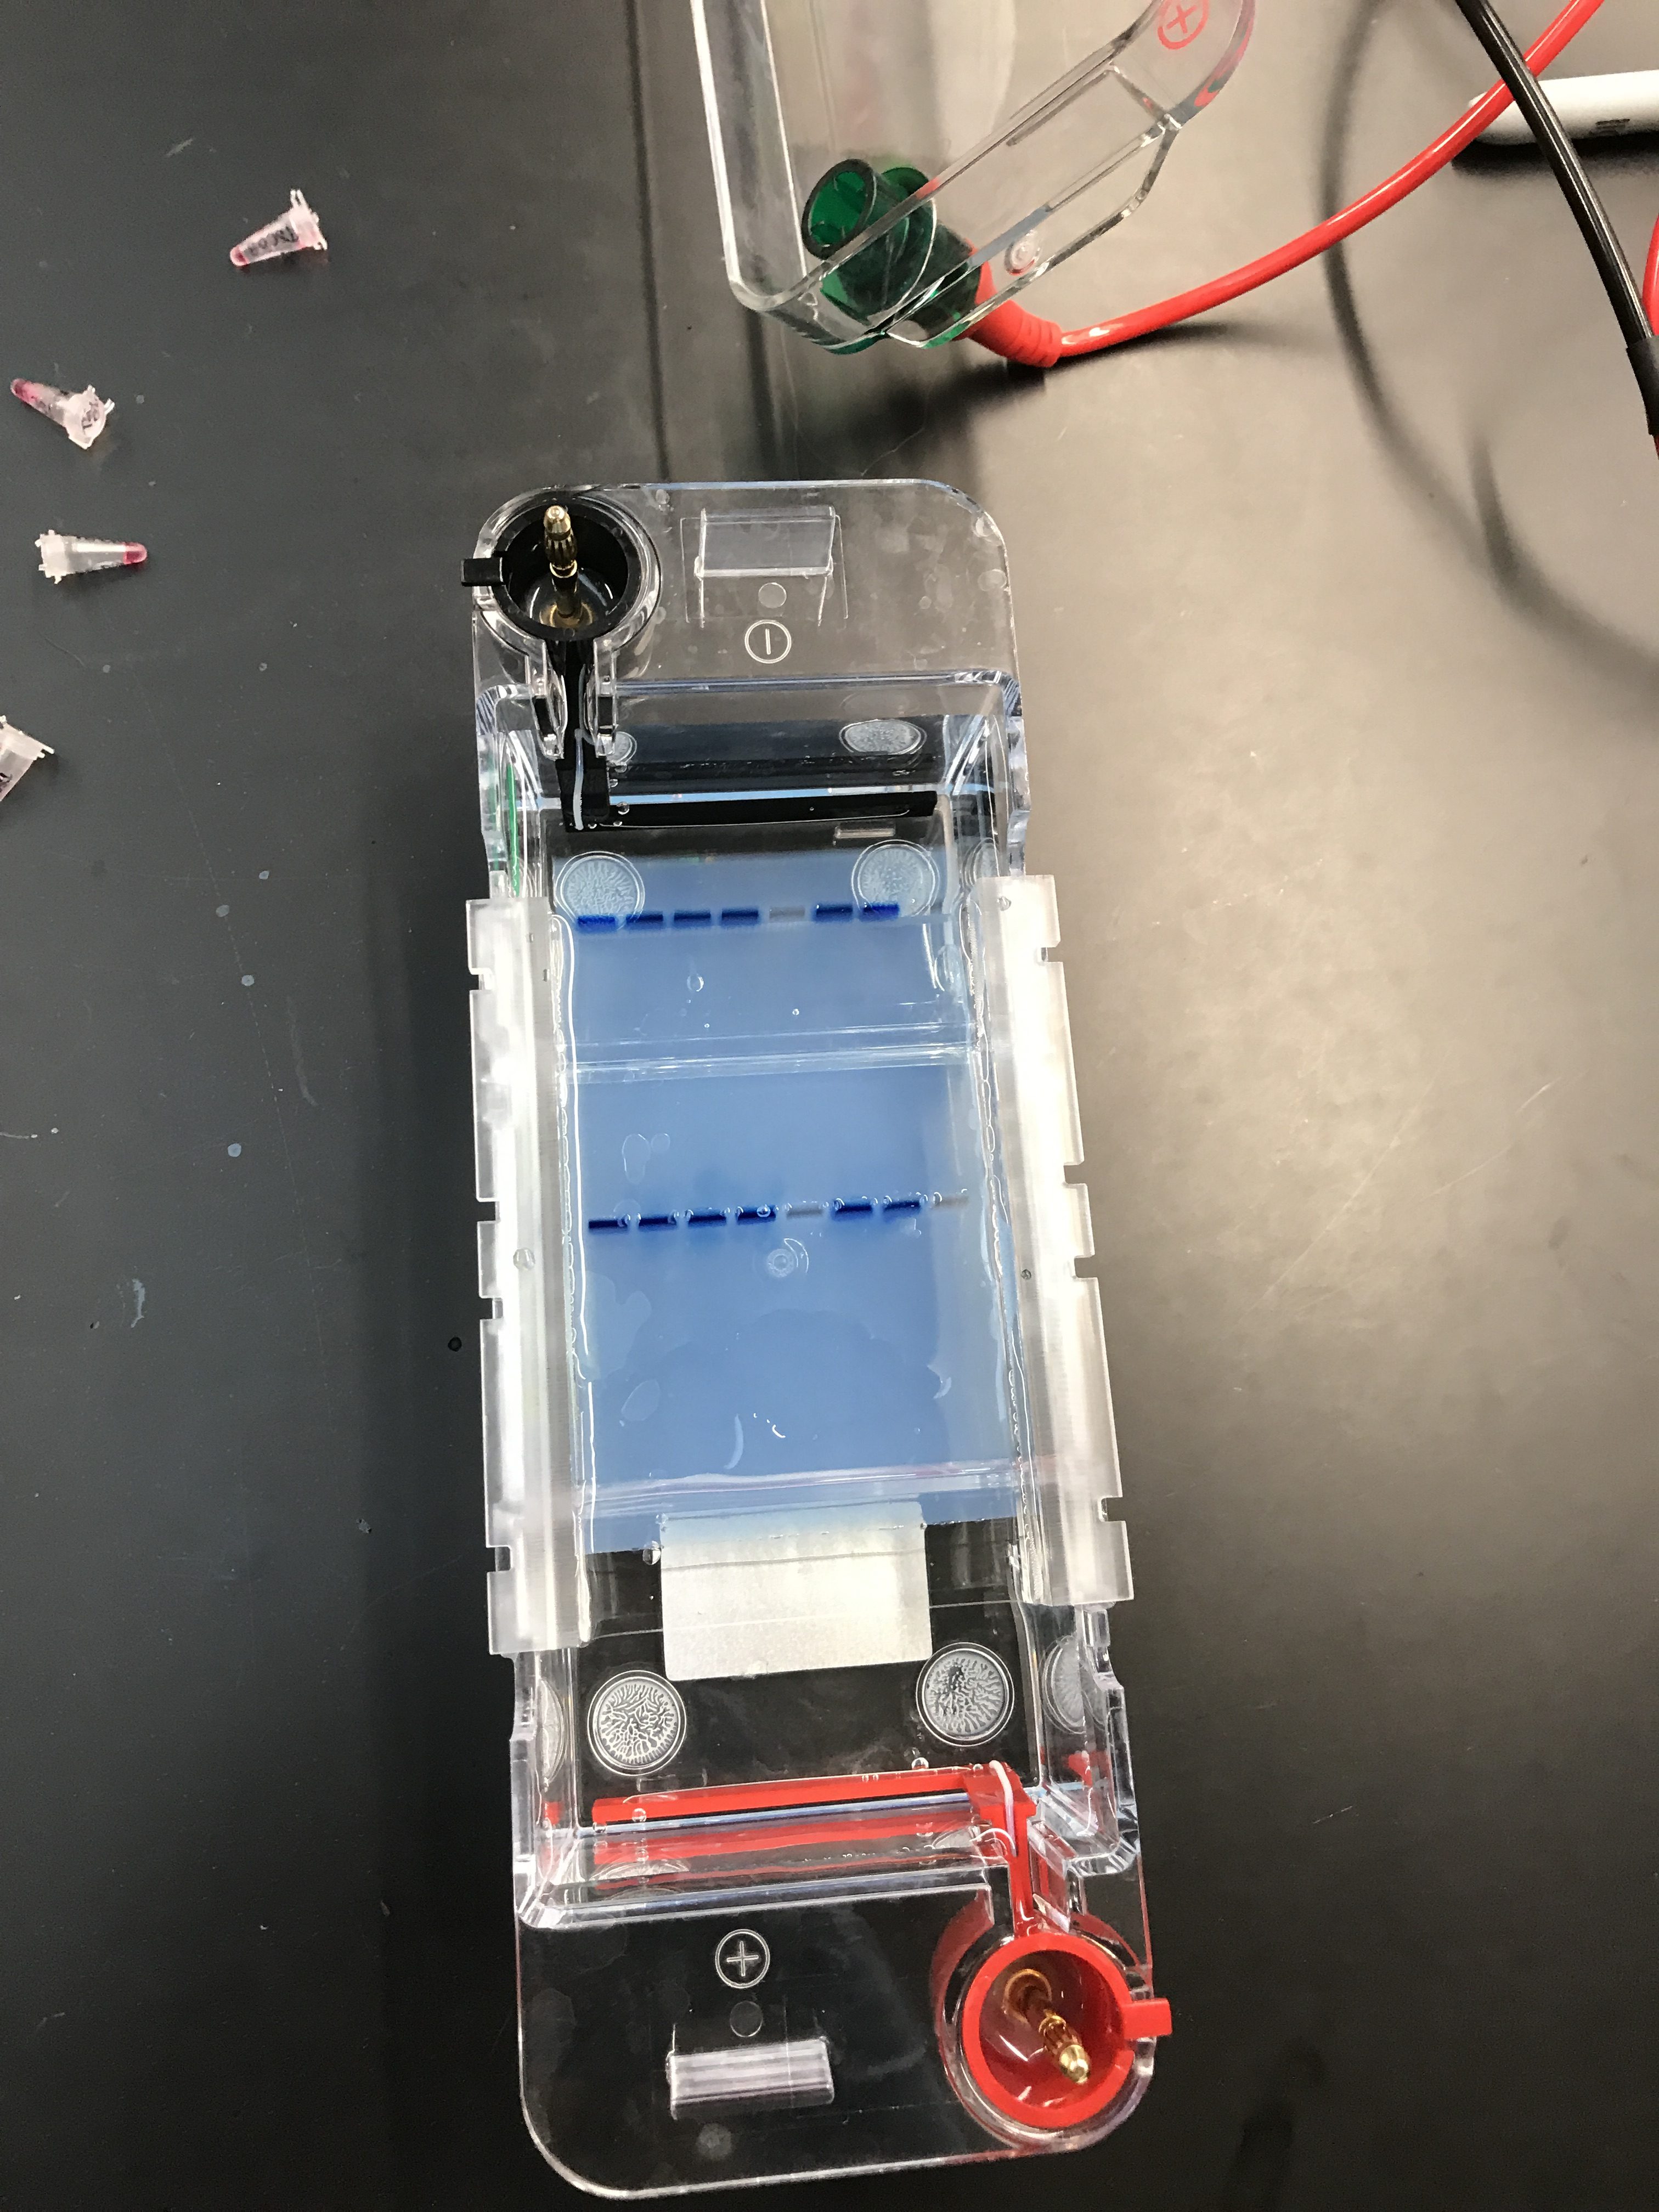 A p10 pipette was readjusted to 8 µl used to pipette each dot on the Parafilm into the appropriate well of the gel tray. The gel box was covered, and was allowed to run for 15 minutes at 145 volts.
Following the run, the gel tray was scanned.
The data collected from the PCR product scan was used to perform ExoSap PCR to clean-up unsuccessful PCR reactions.
For the PCR products that needed to be cleaned up, PCR tubes were labeled with the sample’s corresponding unique ID. For this part, samples 1, 2, and 4 needed to be cleaned up. Thus, 3 PCR tubes were labeled: mh01, mh02, mh04.
One ExoSap master mix was made for each table. Thus, for our table, the volumes of reagents listed in the ExoSap master mix recipe were multiplied by 10 (to account for the number of PCR reactions needed to be cleaned up). The reagents and volumes used to make the recipe were: 105.9 µl purified water, 12.5 µl 10x buffer (Sap 10x), 4.4 µl Sap, and 2.2 µl Exo.
Next, a p10 pipette was used to add 7.5 µl of each PCR product that needed to be cleaned up into the appropriate tube. Using a p20 pipette, 12 µl of the ExoSap master mix was added into each PCR tube. Finally, the tubes were placed in the thermocycler for 45 minutes that was set at EXOSAP program. After the run was complete, PCR tubes were placed in the freezer.