The Sushi Test illustrated the use of molecular tools and methods to amplify, sequence, and ultimately identify each sample’s species through its genomic DNA (gDNA). As such, fish samples were procured, disassembled for DNA extraction, run through Agarose gel electrophoresis, PCR-amplified, and commercially sequenced to discover whether the identities of the fish species corresponded to the labels used.
Collection
During the collection phase of the experiment, five sushi samples from Japanese restaurant Fujiyama-ya were obtained on September 4th at approximately 7pm. Using the cryo tubes provided, a very small portion of each fish sample was broken apart and placed inside of their respectively labeled containers. The samples were refrigerated until the day of the experiment.


Extraction
After obtaining the sushi samples, the next step involved extracting the DNA from the animal tissues. To do this, a DNA extraction kit, Sigma REDExtract-N-Amp Tissue PCR Kit, was utilized. This kit included three solutions: Extraction solution (ES), Tissue Preparation solution (TPS), and Neutralizing solution (NS). Other necessary materials were p200 micropipettes and micropipette tips, 1.5-mL microcentrifuge tubes, scalpels, weighing paper, balance, heat block, vortex, ice, sharpies, gloves, and ethanol solution. The following procedure was performed:
- Each sample was given a unique ID code, which was recorded on the “Animal Tissue DNA Extraction” data sheet.
- After putting on gloves, a sharpie was used to label five 1.5-mL locking lid microcentrifuge tubes with the unique ID codes of the five samples. The ID code was written on both the top and the side of the microcentrifuge tubes.
- The samples were brought to a separate table to be prepared. Using a scalpel, a small piece of the sample was cut and placed onto a weighing paper.
- After taring the balance with the weighing paper, the cut sample was transferred to weight it with a goal of 2-10mg.
- The scalpel was cleaned with ethanol solution after each sample, and a different area of the weighing paper was used to disassemble different samples.
- Repeat steps three through five with the other four samples, or estimate using the amount portrayed by the first sample.
- Set aside the prepared samples.
- Using a p200 micropipette and an unfiltered tip, 100-μL of ES was added to each of the labeled microcentrifuge tubes.

- 25-μL of TPS was then added to the microcentrifuge tubes using the same pipette but with a new unfiltered tip.
- To mix the solution of TPS and ES, the mixture was pipetted. This was repeated for all microcentrifuge tubes.
- Using foreceps, each sample was added to the corresponding tube containing the extraction mixture.
- The tissue sample was mashed inside of the tube using an unfiltered tip, making sure to change tips after each tube.
- Set the sample aside to incubate for ten minutes at room temperature.
- Put samples on a heat block and incubate the tubes at 95°C for three minutes. Use a timer to ensure that the incubation time is exact.
- Remove the samples from the heat block.
- Using a p200 pipette and filtered tips, add 100-μL of NS and mix by pressing tube down onto the vortex machine.
- Place samples in ice, and check that the labels are still legible.


Agarose Gel Electrophoresis
The gel provided in this procedure was 1% agarose gel with GelRed added. Specifically, the composition of the gel involved 0.5g of agarose, 50-mL of 1x TAE buffer, and 0.5-μL of diluted GelRed for every 50-mL gel. The ensuing steps outline the set up of the gel box and sample preparation for gel electrophoresis to determine whether genomic DNA was obtained after the initial extraction:
- The gel tray was placed into the gel box with the top of the gel facing the red electrical connector.
- 1x TAE buffer was poured into the gel box wells, covering the gel with a small amount of bugger (about several millimeters).
- A medium-sized piece of Parafilm was cut.
- Using a p10 micropipette, pipette five dots of 2-μL Loading Dye in a row onto the Parafilm.
- Using the same p10 micropipette but with a filtered tip, add 3-μL of the genomic DNA from the microcentrifuge tube to the dot of Loading Dye. Make sure to switch pipette tips for each sample, and that each sample occupies their own respective dot.
- The genomic DNA added to the Loading Dye was equivalent to 5-μL, so the pipette reading was changed to 5-μL, and used to pipette the dots into the wells on the agarose gel. Record and take note of the wells for the respective specimens loaded.
- The lid was placed on the gel box with the colors of electrodes matching, and the power supply was turned on.
- The machine was set at 145 volts and run for approximately 15-20 minutes.
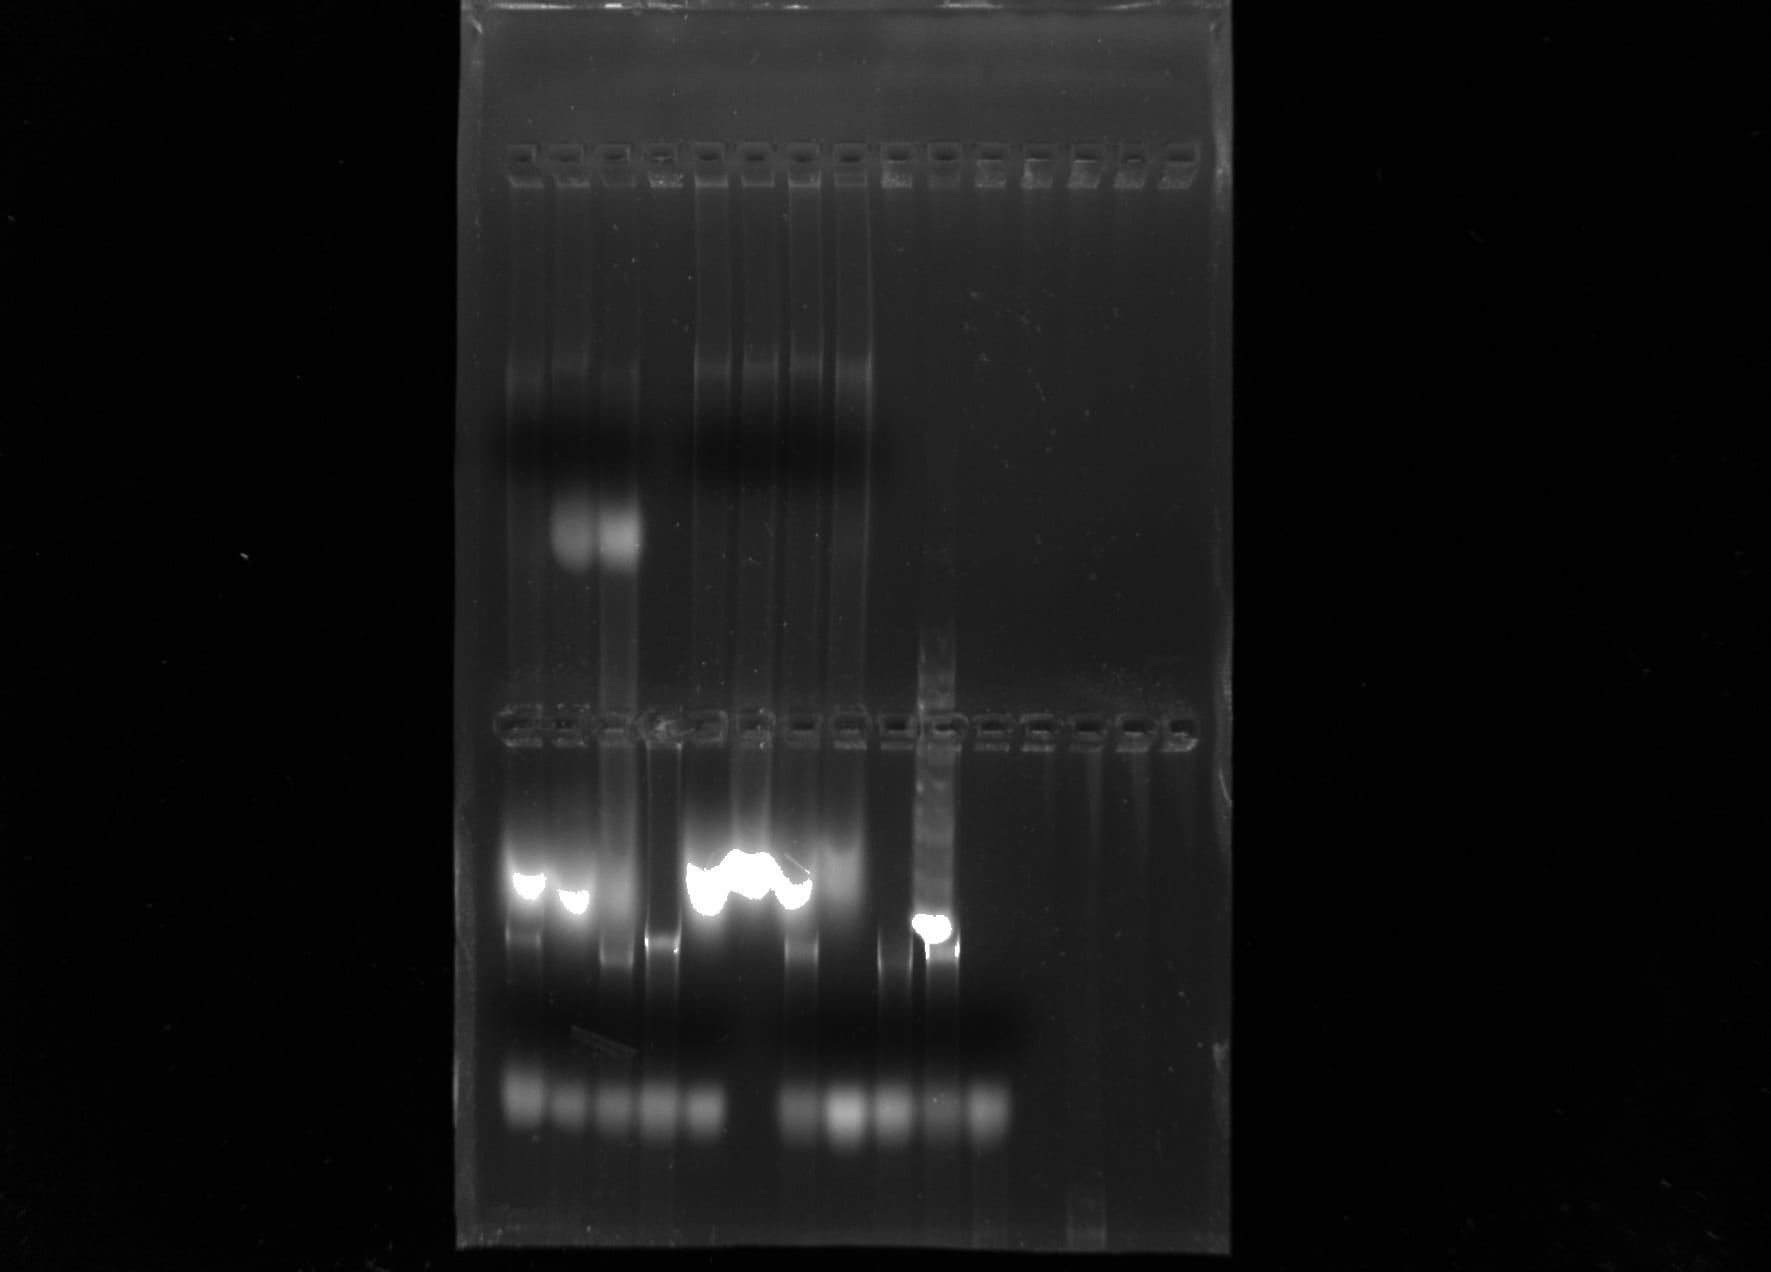
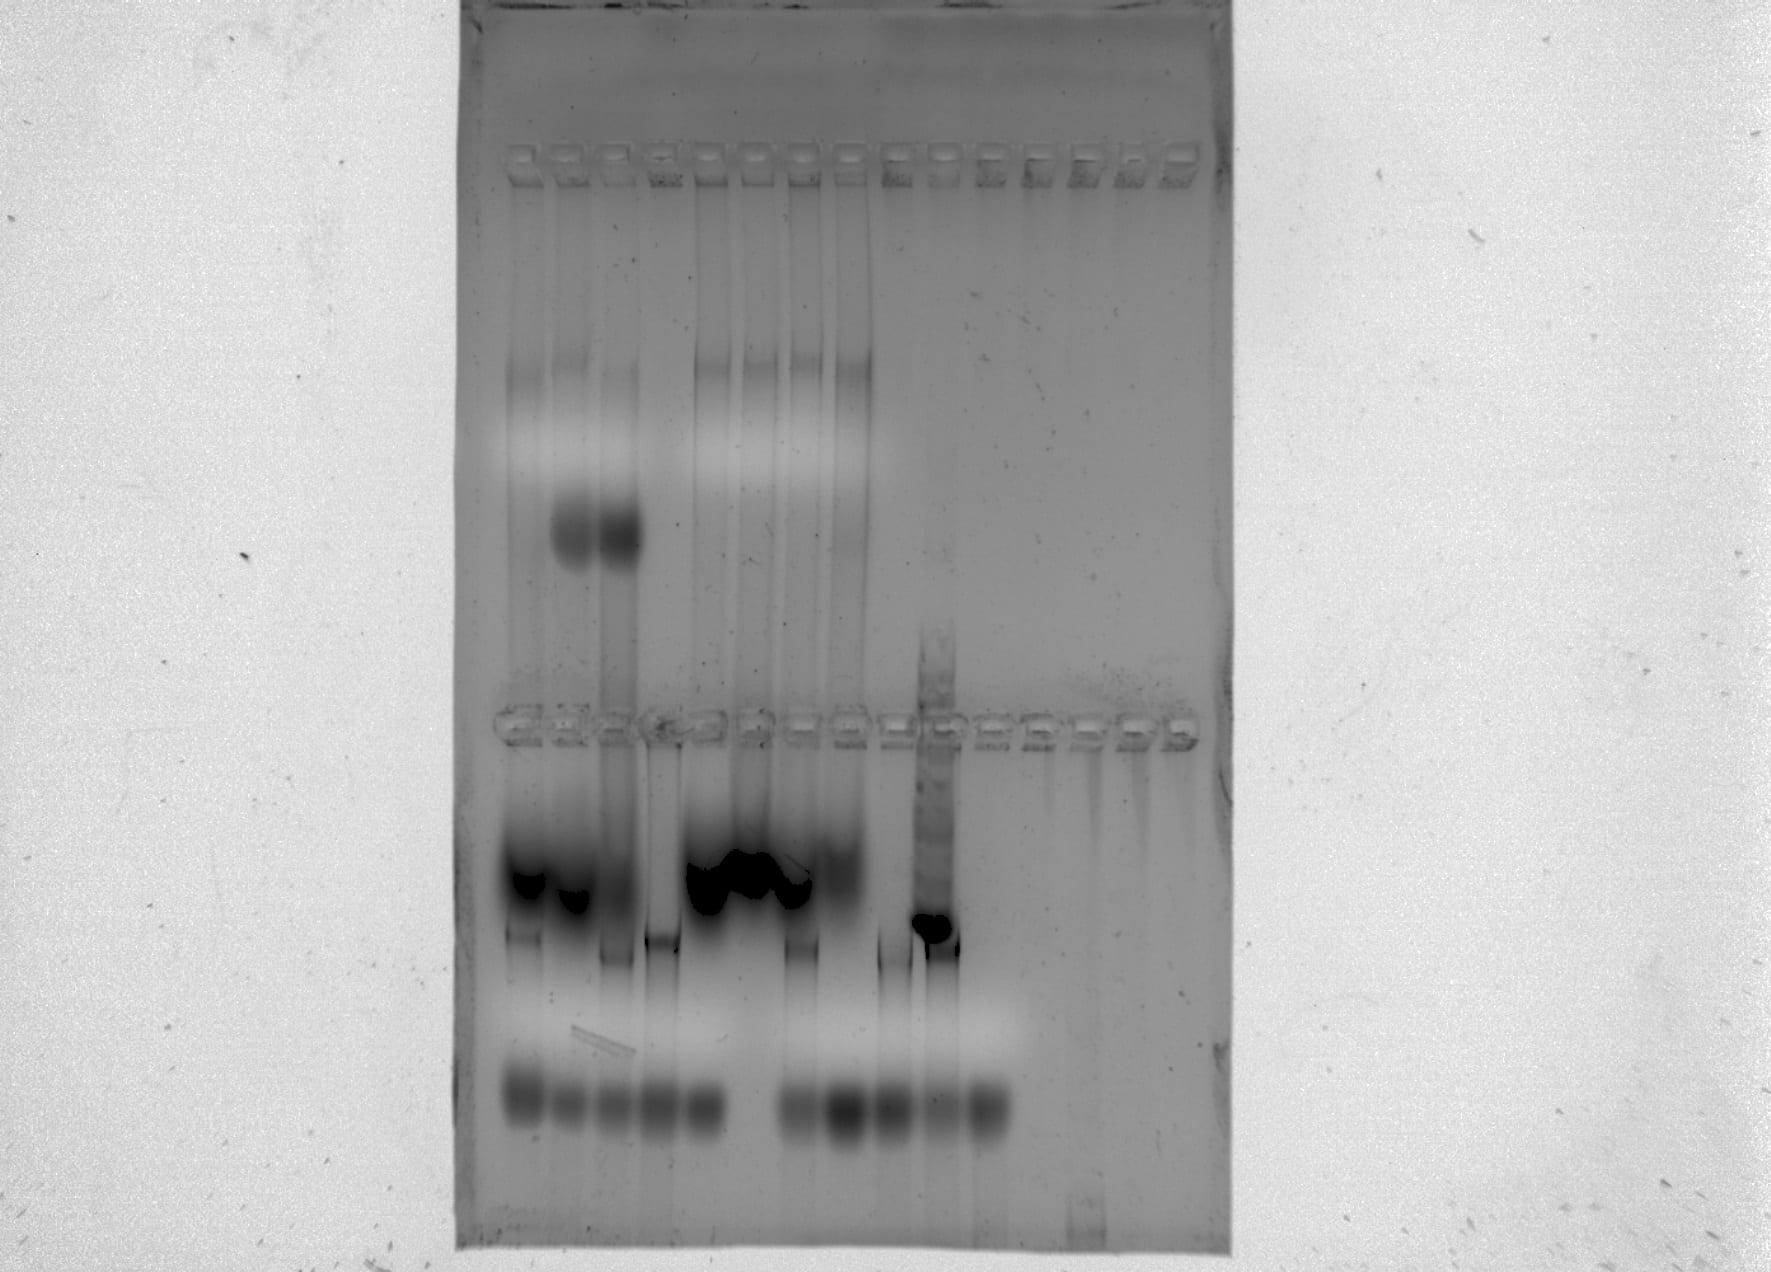
After running the gel electrophoresis, the machine was turned off and unplugged. The lid was taken off of the apparatus to expose the wells and gel box. Gently removing the gel box from the apparatus, the gel was moved to the imaging machine to be examined under UV light. The resulting picture produced by the imaging machine indicated that a good amount of genomic DNA was obtained from the samples of fish.
PCR Amplification of CO1
Subsequent to confirming the presence of genomic DNA, the Sigma REDExtract-N-Amp Kit contained the necessary materials for PCR amplification, such as Taq polymerase, deoxyribonucleotide triphosphates, forward and reverse primers, and buffers that work with the materials from the extraction step. Additional materials include: purified water, p200 micropipettes, filtered micropipette tips, and a master mix containing the ingredients for PCR. Dilution of the genomic DNA was necessary to increase the efficiency of PCR because PCR works optimally with a minute amount of DNA template, whereas the creation of a master mix, which includes the sum of all reagents necessary for multiple samples, lessens the mistakes that can be made when pipetting small amounts. The following protocol details the gDNA dilution and making of the master mix necessary for PCR amplification.
- To make a 10:1 dilution of the gDNA obtained from the fish samples, microcentrifuge tubes were first labeled “1:10” along with the ID code of the samples including initials. Ensure that both the top and the side of the tube was labeled with this information.
- 18-μL of purified water was added to the five microcentrifuge tubes using p200 micropipettes.
- 2-μL of each genomic DNA was then added to the corresponding tubes.
- The solutions were mixed by flicking the tubes.
- Following the recipe featured below, a master mix was made.

- Five PCR tubes were labeled on the sides and tops with the identification information of the gDNA samples.
- 2-μL of the 1:10 diluted gDNA was added to the PCR tube, then 18-μL of the master mix was added to the same tube.
- Repeat step 7 with all five samples, changing filtered tips between different gDNAs.
- Place the PCR tubes on ice until they can be placed in the thermocycler.
