How to turn off the sleep setting.
I don’t actually advise turning the sleep setting off but rather extending the timeout period.
Windows 10
- Hit ‘windows key’ then type in “Sleep”
- The “Power & sleep settings” will pop up at this point, hit enter.
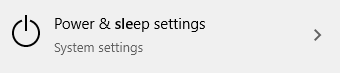
- You may need to click on it, or may need to highlight it before hitting enter.
- Once in the menu, go to the screen section and choose a timeout time.
- You should be in the “When plugged in, turn off after” section if you are on a laptop in one of the classrooms.
- On average 30 minutes should be fine, but fine-tune it to the time that you wish and close the window.
- You can use the Arrow keys or the scroll function to select the time you want.
- Note that you may have the ability to set the time to “never” in order to make the screen always on. I do not recommend it, for if you forget to turn the laptop off when you leave the classroom. You may still be logged on.
Mac
- Hit ‘command’ + ‘space bar’ then type in “Energy Saver” and hit enter.
- Choose between “Battery” and “Power Adapter”.
- The Power Adapter is when it is plugged in.
- Move the slider “Display Sleep” to the appropriate time and close the window.
If you have any questions you can ask it down below or email me at ashackelford@usfca.edu
Please let me know if the information is inaccurate.
