Molecular Ecology Lab 02: The Sushi Test
Allyson Luber — 9/9/19
- Date, time, and location of purchase of sushi: Monday, September 2, 2019 at 6:52 PM at Sushi House restaurant (Alameda, CA)
- Fish was stored in separate screw-top mL tubes in refrigerator overnight until lab the next day
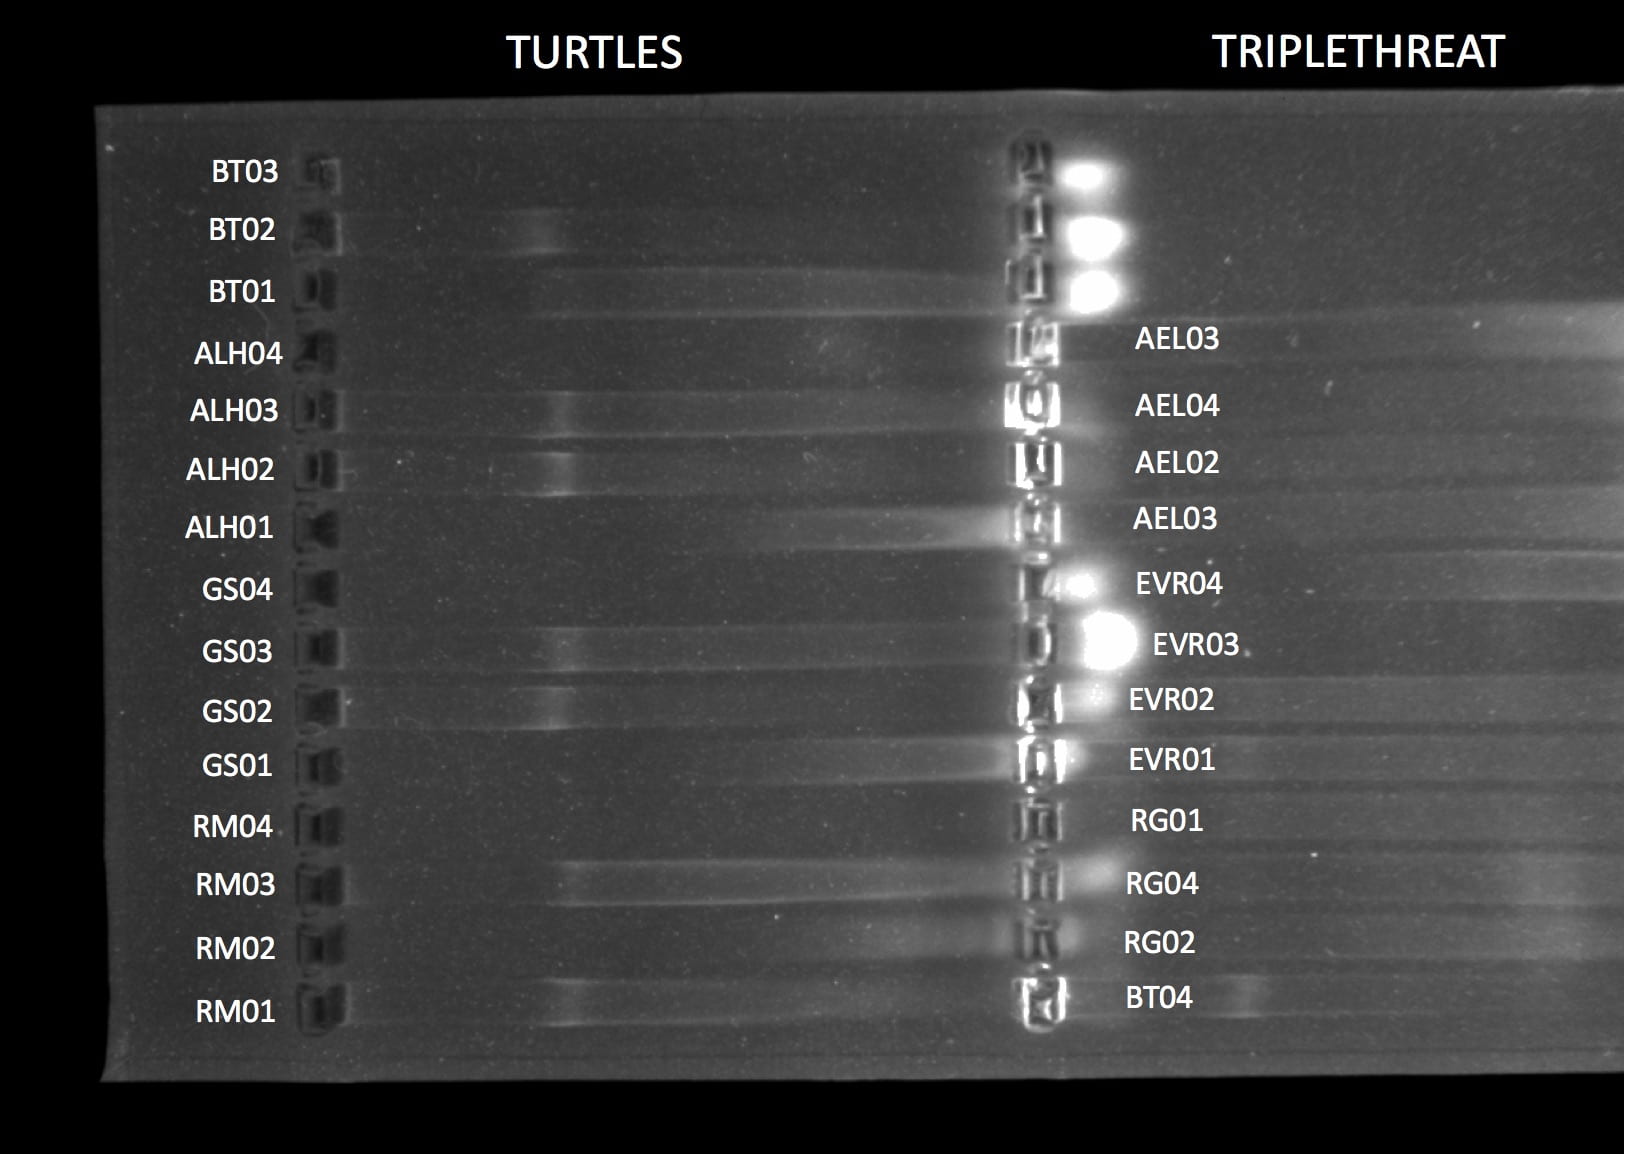
- Group name: Triple Threat
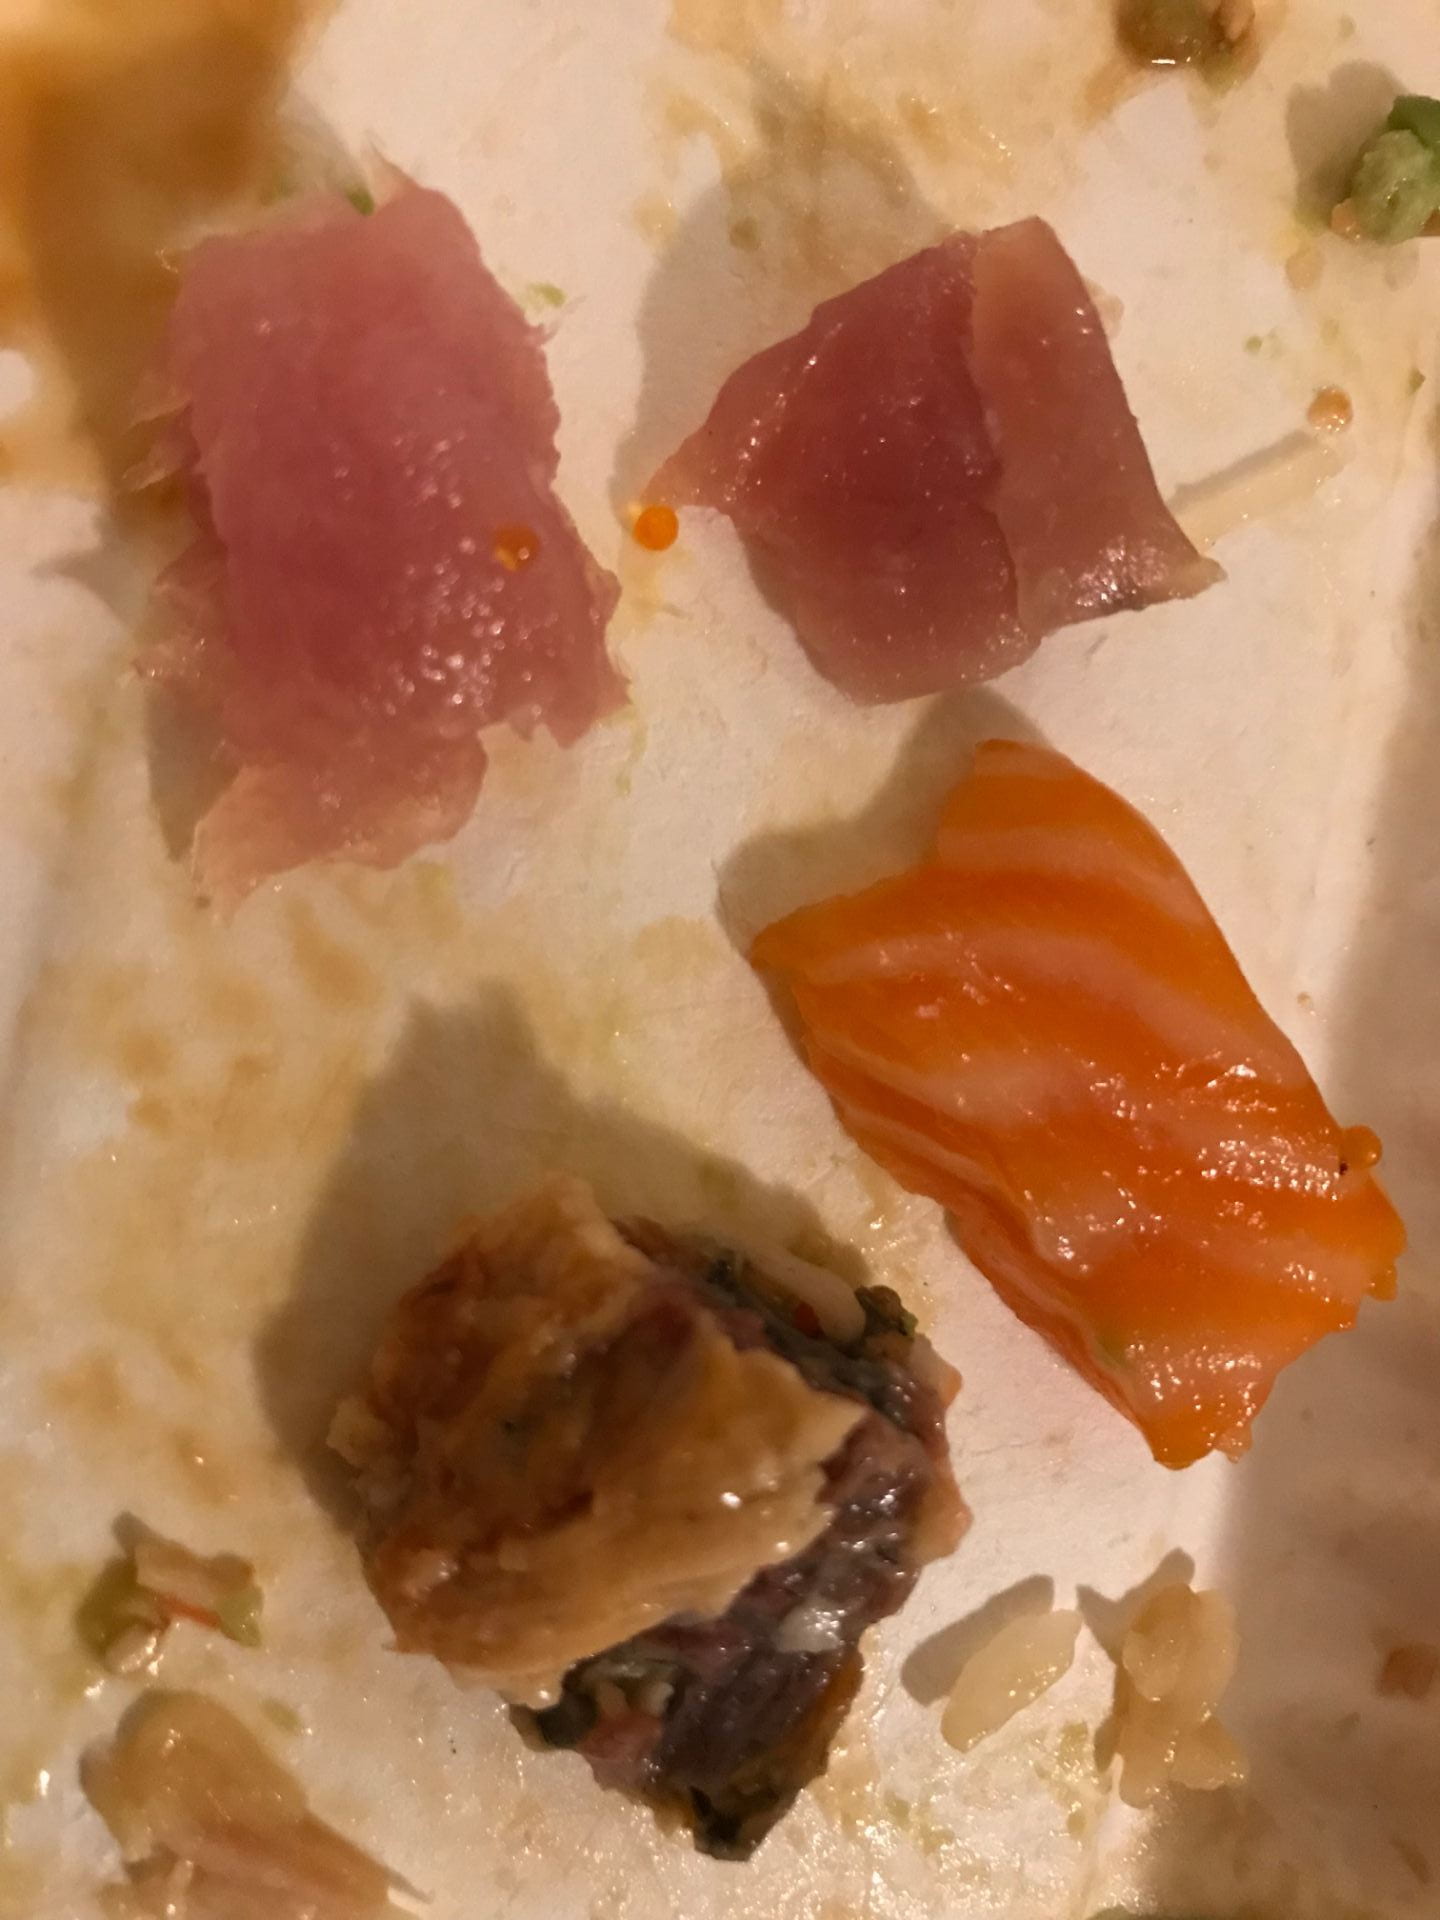
- Samples (4)
- Salmon (AEL-01) – bottom right
- Mackerel (AEL-02) – bottom left
- Ahi tuna (AEL-03) – top right
- White tuna (AEL-04)-top left
Protocol for DNA extraction from animal tissue
Reagents: DNA extraction kit (Sigma REDExtract-N-Amp Tissue PCR Kit)
- Extraction Solution (labeled ES)
- Tissue Preparation Solution (TPS)
- Neutralizing Solution (NS)
Materials:
- p200 microcentrifuge
- 1.5 ml microcentrifuge tubes
- Razor blades, scissors, scalpels, tweezers
- Heat block
- Vortex
- Ice
- Sharpie
- Gloves
- Paper plate
1. First we individually recorded the information about our samples on the “Animal Tissue DNA Extraction” data sheet, giving each of the samples a unique ID code (code is written next to species name above)
2. We used gloves for protection against the potentially harmful solutions and so our human DNA wouldn’t contaminate the samples.
3. Next we labeled one 1.5 ml Screw-cap or Locking Lid microcentrifuge tube for each of our samples
with the unique ID code. Using a sharpie and writing the unique ID code BOTH on the side and on the
top of the tube to easily identify our samples.
4. Using a razor blade and tweezers, we cut our samples into smaller pieces on a paper plate as well as brushing away debris from the fish, making it pure and clean as possible (from rice or seaweed).
5. With a tare paper we weighed our sample on the scale. The goal is to get 2 – 10 mg of sample tissue, which will be a very small piece.
6. Added 100 μL of Extraction Solution (ES) to each of our labeled sample tubes (use a p200 μl
micropipette and unfiltered tips).
7. Added 25 μL of Tissue Preparation Solution (TPS) to the microcentrifuge tubes with the 100 μl
of Extraction Solution (ES) and micropipette up and down to mix (use a p200 μl micropipette
and unfiltered tips).
8. Carefully, we added each sample to its corresponding extraction microcentrifuge tube using forceps.
9. Take a disposable non-filtered pipette tip and, with our hand we used it to
gently mash our tissue sample up a bit for approximately 2 minutes.
10. Incubated the sample at room temperature for 10 minutes.
11. Moved our samples to the heat block. Incubated the sample at 95 degrees Celsius for 3 minutes.
12. After 3 minutes we took the sample out of the heat block and added 100 μl of Neutralizing Solution (NS) (using a p200 pipette and filtered tips) and mixed by vortexing.
13. Last step was to put samples on ice bucket.
Procedure for Amplifying C01 from Fish
* Use filter tips for all PCR steps*
1. Diluting your gDNA
- The first step to making a 10x dilution of gDNA was to label a microcentrifuge tube on the top and side with “1:10” including the unique code to avoid confusion later.
- Added 18 μl of purified water to the tube
- Added 2 μl of our gDNA to the tube
- After adding the liquids, I flocked the tube with finger to mix the solution
2. The PCR Reaction
* Just one master mix was made per table *
Master Mix (original volume was multiplied by 13 in order to get master volume, excluding tissue extract)
Reagents
- Water (PCR Quality): 83.2 μl
- REDExtract-N-Amp PCR rx mix: 130 μl
- Forward primer: 10.4 μl
- Reverse primer: 10.64 μl
- Tissue Extract (gDNA- 1:10 dilution): 2 μl
Total Volume : 234 μl
- Added 2 μl of the 1:10 dilution of our gDNA to each of our PCR tubes, except the negative control.
- Lastly we pipetted 18 μl of the master mix into each of our PCR tubes, including the negative control, making sure to change tips between samples.
- This reaction was left in ice next to the thermocycler until all PCR reactions were set up. then put the PCR tubes (all samples and the negative control) in the thermocycler and start the reaction, which takes between 1.5-2 hours. The PCR reactions were placed in the freezer when the cycling was complete.
Settings for the thermocycler:
- 94 degrees C – 4 min (initial denaturation)
- 30 cycles of:
- 94 degrees C for 30s (denaturing)
- 52 degrees C for 40s (annealing)
- 72 degrees C for 1 min (extension)
- 72 degrees C for 10 min (final extension)
- 10 degrees C hold
Results