On Wednesday, November 1st, we began lab by running an ISSR test gel. We performed gel electrophoresis with dilutions of L. arboreus DNA samples with ISSR markers.
We also prepared template DNA from the L. arboreus samples gathered in the various locations. We then prepared Master Mix with the two suitable ISSR markers, Omar and 17898. We added this Master Mix to each tube containing template DNA, as well as the negative control tubes. Finally, we performed PCR in order to visualize variation between L. arboreus samples. The ISSR markers we chose should give us the highest resolution of genetic differences between the L. arboreus populations that both we and Professor Paul sampled.
Procedure:
- We identified the strip of ISSR PCR tubes that we used last week and added 1 microliter of loading dye to each tube.
- Later, I realized that I had used only 5 microliters but had somehow managed to stain both my skin and clothes?!? I felt despondent, but then remembered that “the fun never stops”. Reinvigorated, I plunged myself into the following steps.
- Next, we loaded 10 microliters of the mixture from each PCR tube into wells of a 1.3x agarose gel.
- Finally, we performed gel electrophoresis for 1.5 hours at 60 volts. Performing gel electrophoresis at a lower voltage for a longer period of time will give us greater resolution in terms of how the fragments run out over the gel.
- We viewed the images of the gel electrophoresis, and determined that the Omar and 17898 ISSR markers were the most suitable to view variation across L. arboreus populations.
Preparing template DNA
- I chose two 0.2 mL PCR tube strips and I labeled them in the following way, accounting for a negative control in each strip.


2. I pipetted 1 μL of my first sample of template DNA into the first tube of each PCR strip with filtered tips. I changed PCR tips between samples.
3. I repeated this pipetting for each sample, pipetting template DNA into the appropriate tube in each PCR strip.
4. I did not place any template DNA into the last tubes in each PCR strip, which were the negative controls (labeled neg. con.).
5. I placed lids on each PCR strip and placed them on ice.
Setting up Master Mix
- We calculated the amount of reagents for 20 reactions at our lab table.
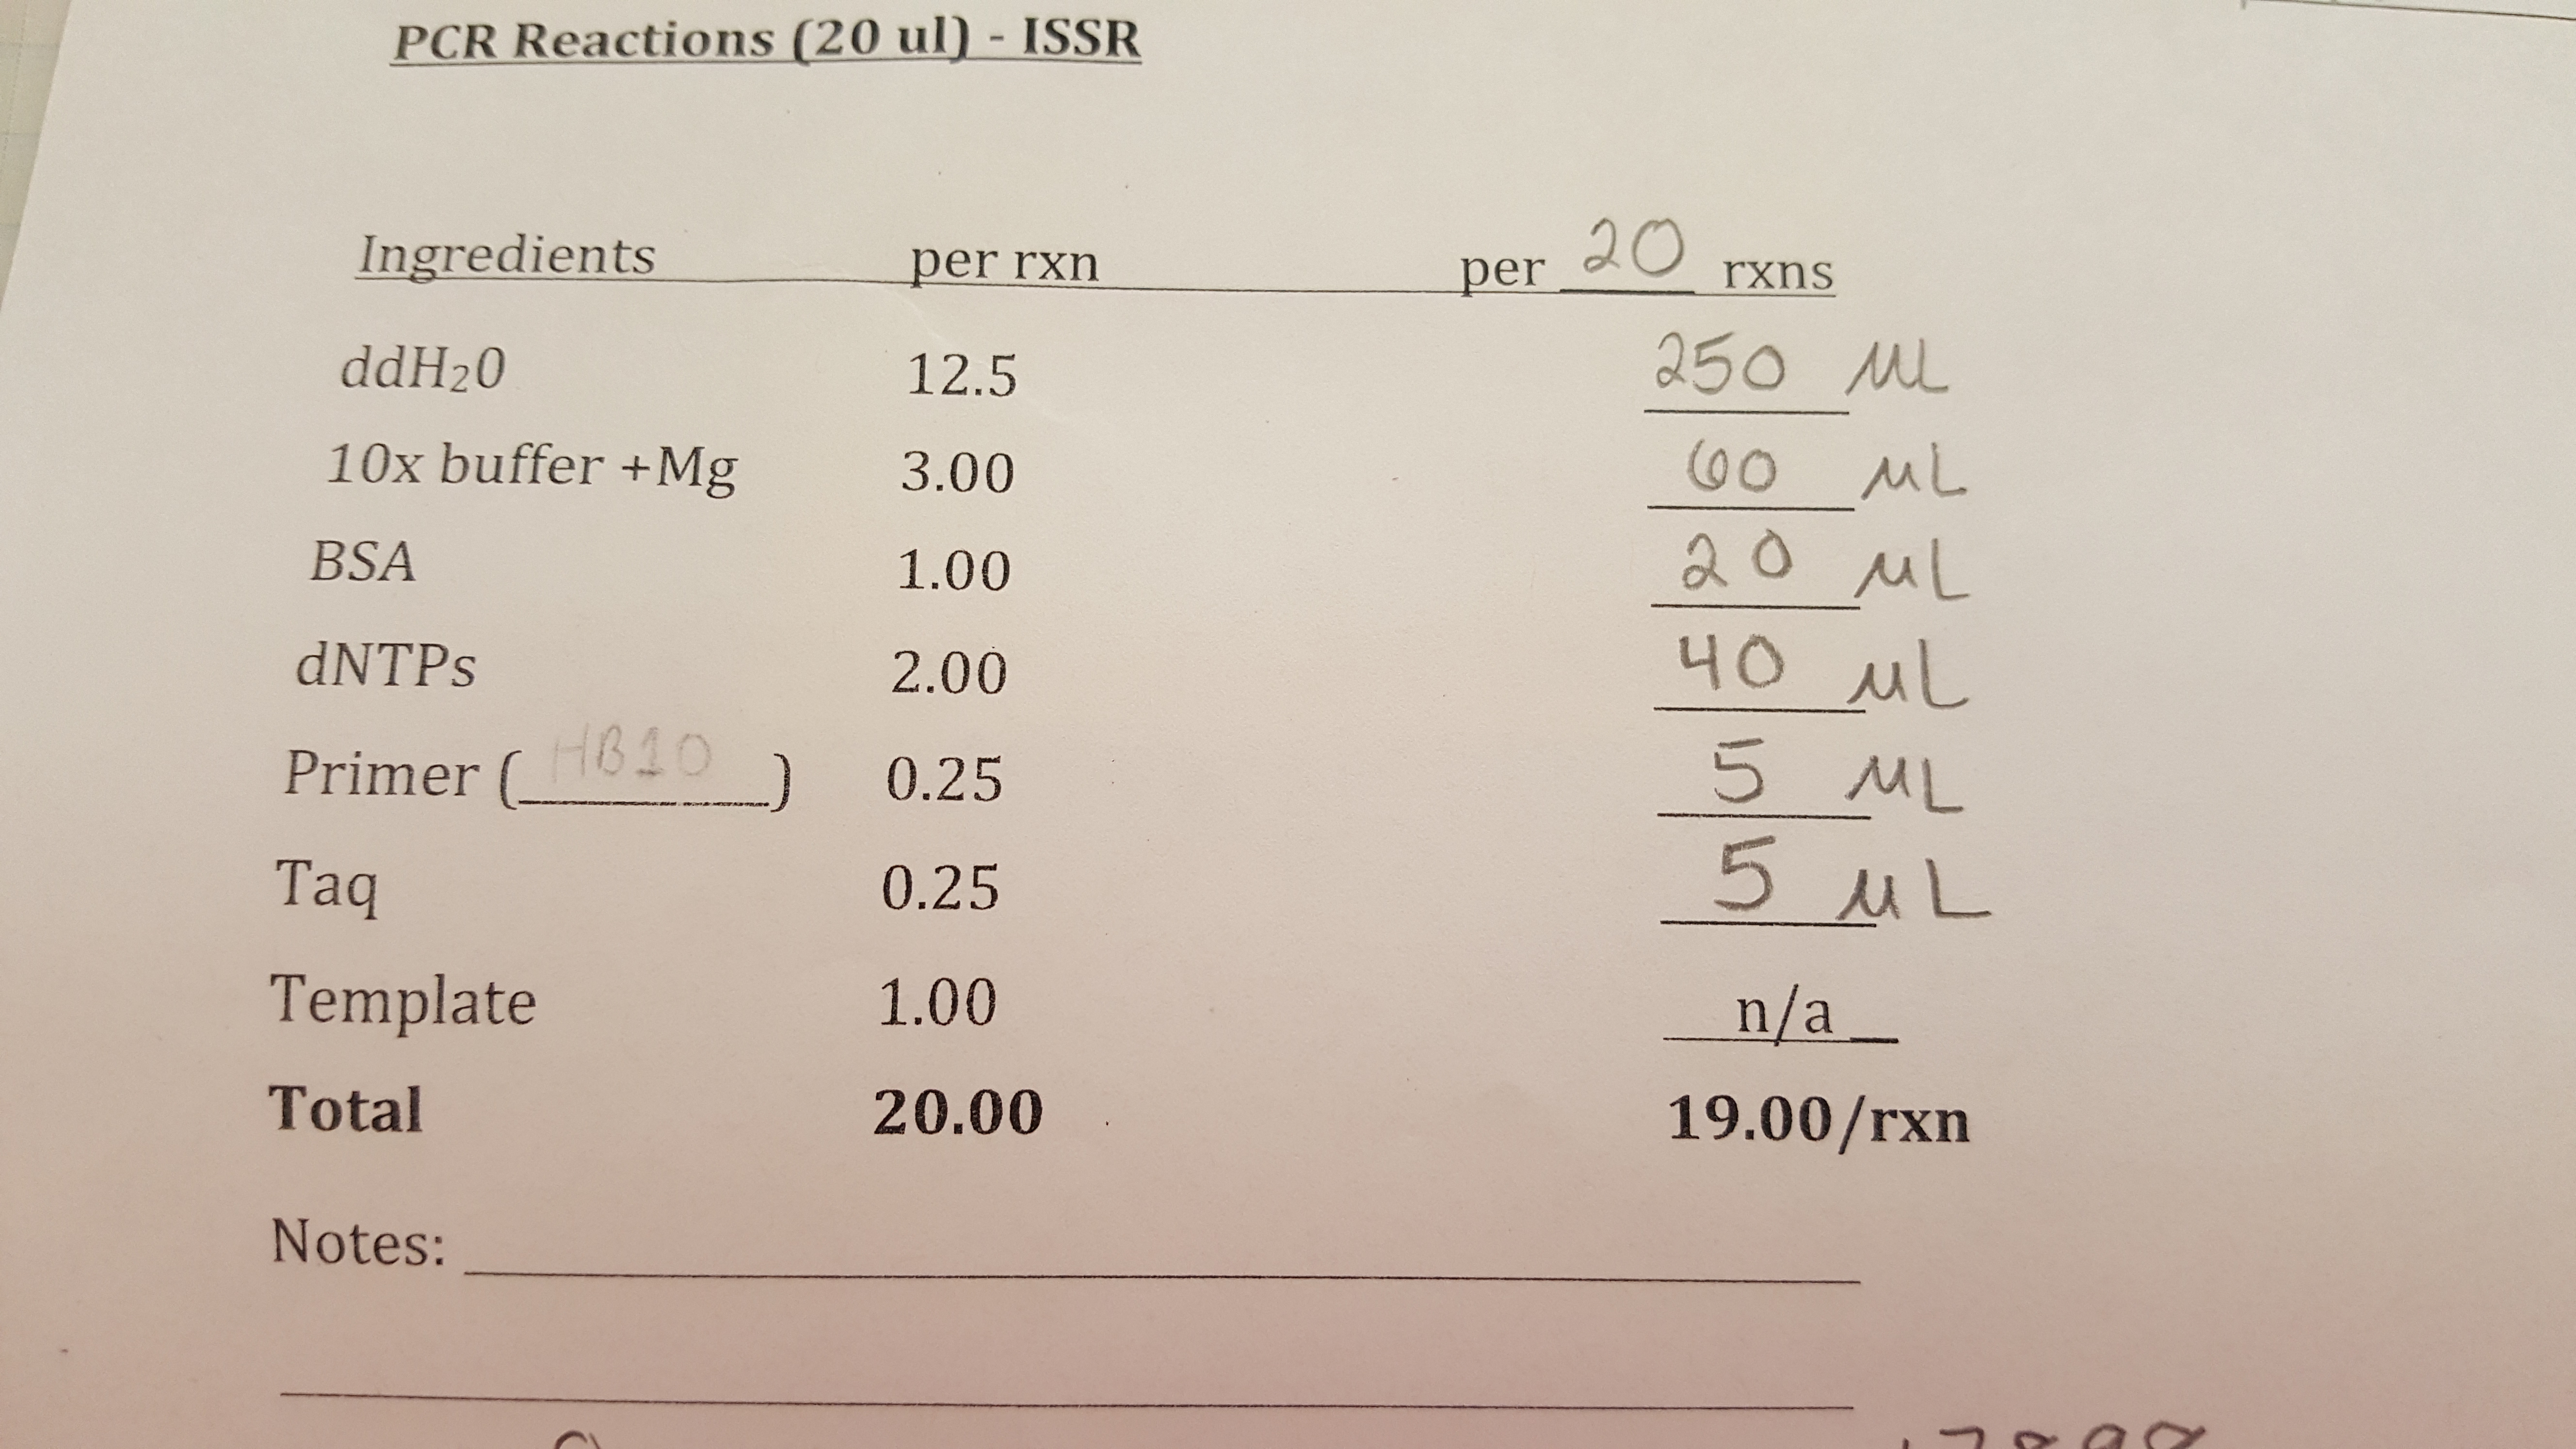
- We labeled 2 1.5 mL tubes as MM (Master Mix) in order to mix the reagents. One tube was labeled Omar, and one was labeled 17898.
- We also placed the reagents on ice after they thawed.
- We added the reagents to the MM tube in the following order: distilled water, 10x PCR buffer, BSA, dNTPs, and ISSR primer (either Omar or 17898).
- We placed the Master Mix on ice.
- Prof. Paul pipetted 5 μL of Taq into the Master Mix.
- Next, we each pipetted 19 μL Master Mix into each of our PCR tubes, mixing by pipetting up and down. We changed pipette tips in between each tube.
- I also pipetted Master Mix into my negative control tubes (labeled neg.con.).
- I closed my 17898 tubes tightly and placed them in the PCR machine. I placed my Omar tubes in a rack at the front of the room so Prof. Paul could perform the PCR in his lab.